Setting up a custom ACF field for TablePress is very simple with the ACF: TablePress add-on. The plugin can be downloaded from the WordPress plugin repo, or installed directly from your site's dashboard under Plugins>Add New.
This add-on for Advanced Custom Fields creates a custom field type to select a TablePress table, providing a dropdown menu that lets you select from a list of available tables. The field returns the table ID for the table selected.
This plugin requires:
- Advanced Custom Fields version 4+ or 5+
- TablePress version 1.5+
Just to be sure there's no confusion... This plugin does nothing unless ACF (Or ACF Pro) and TablePress are both active on your site
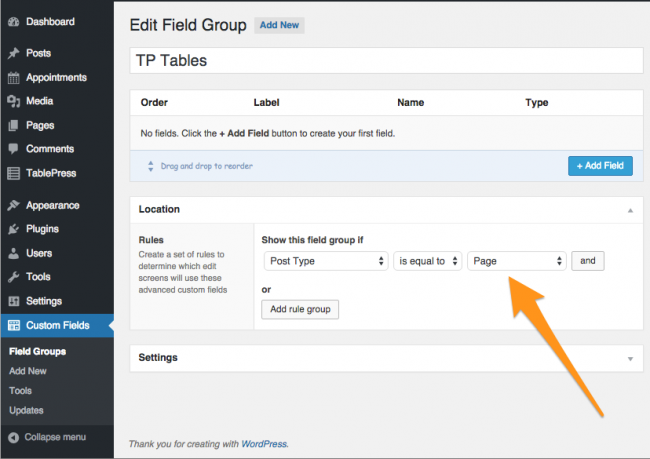
Once the plugin is activated, navigate to Custom Fields, and create a new field group. Under Location, set rules for where you want to be able to use the field (post type, template, etc.)
Add a field, and set it's field type to TablePress. Set it's Field Label (the name to appear while editing the post) and Field Name (the name to use while editing your template file).
Save/update the field group.
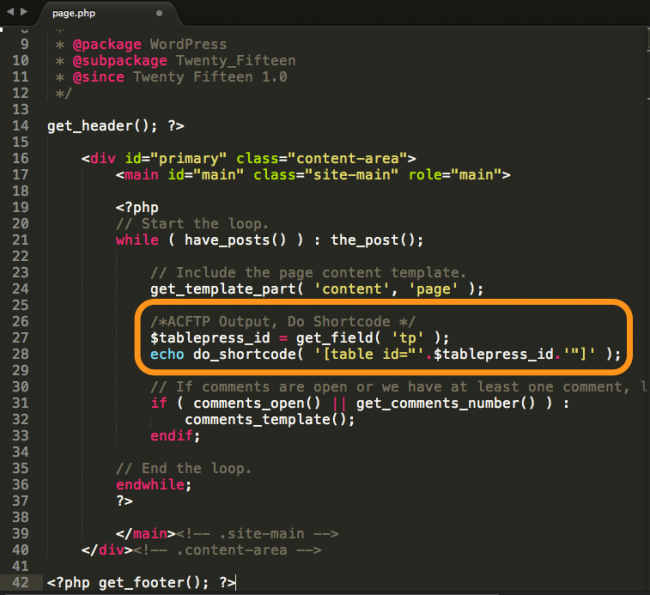
In your theme's template files, insert either of the following code snippets to output your table.
<?php $tablepress_id = get_field( 'your_field_here' ); echo do_shortcode( '[table id="'.$tablepress_id.'"]' );or, to avoid usingdo_shortcode(), use
<?php
    $tablepress_id = get_field( 'your_field_here' );
    $args = array(
      'id' => $tablepress_id,
    );
    if ( function_exists( 'tablepress_print_table' ) ) {
      tablepress_print_table( $args );
    }
You should not be editing your theme's original files! Make sure you're using a child theme to avoid over-writing customizations next time the theme is updated.
The example to the right show the first example inserted in is a copy of page.php from the 2015 theme, placing the table below the content of the page, before the comments.
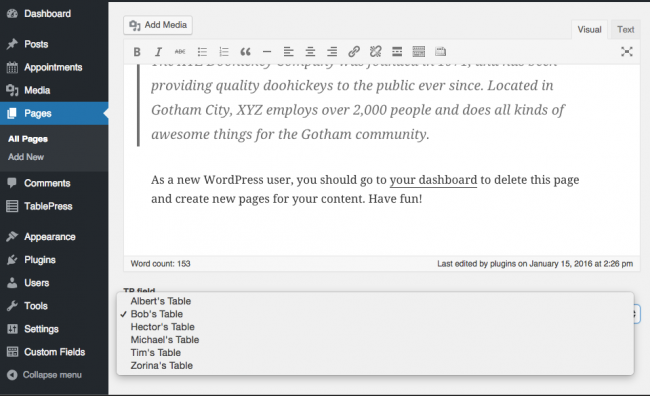
A dropdown list is now available while edited the chosen post type (in this case, any page), and your TablePress tables are listed in alphabetical order. Simply select the desired table and publish/update the post.
Your table should now be visible when you visit your page!
(This example is certainly in need of some styling, but it is there!)


